IRC Software
Clientes
There are many IRC clients that can be used with I2P. In fact, all IRC clients can be connected to the Irc2P Service by connecting them to the IRC Tunnel.
- Pidgin(Windows, Linux) Adium(OSX)
- XChat(Windows, Linux) XChat Aqua(OSX)
- Thunderbird(Windows, Linux, OSX)
- Revolution IRC(Android)
- Dispatch(Windows, Linux, OSX)(WebClient)
Check the IRC tunnel
To configure any IRC client to chat on Irc2P, first, make sure that your IRC tunnel is available. Visit the Hidden Services Manager and look for Irc2P in your "Client Tunnels" section. If the "Status" indicator on the right-hand side is yellow or green, your Irc2P tunnel is ready and you should proceed to the next step.

Any IRC client can be connected to this IRC tunnel, but detailed instructions for several popular clients are provided below.
Pidgin
Pidgin is a very popular Instant Messaging client with built-in IRC support. It is also possible to use it with many other kinds of chat service, and it supports using multiple accounts at once and has a variety of plugin-ins. There is a similar application for OSX called "Adium." The instructions for Pidgin are similar in Adium.
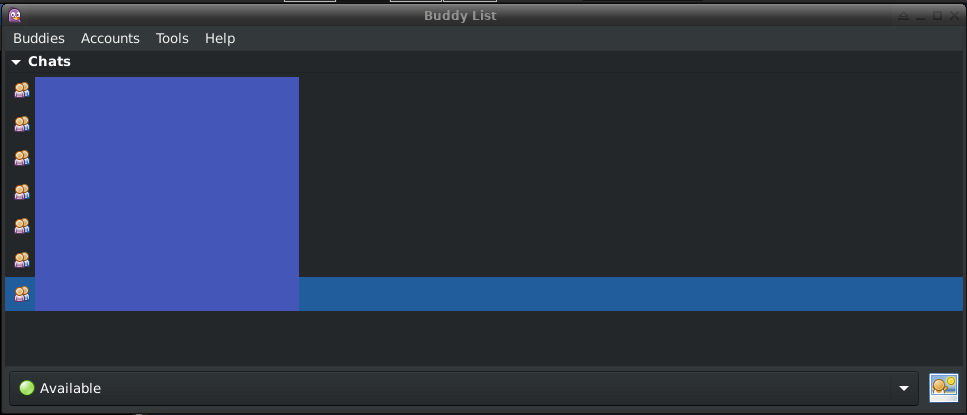
After launching Pidgin, you should see a "Buddy List" window. From that window, open the "Accounts" menu from the toolbar. Select "Manage Accounts" to begin configuring your I2P account.
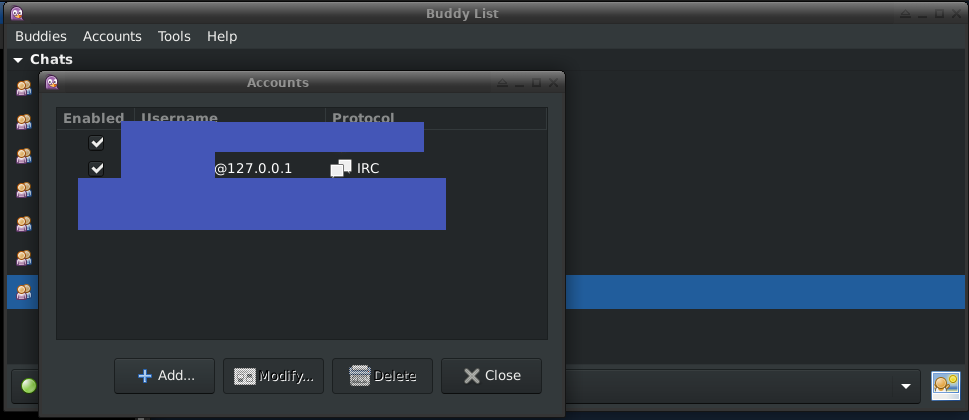
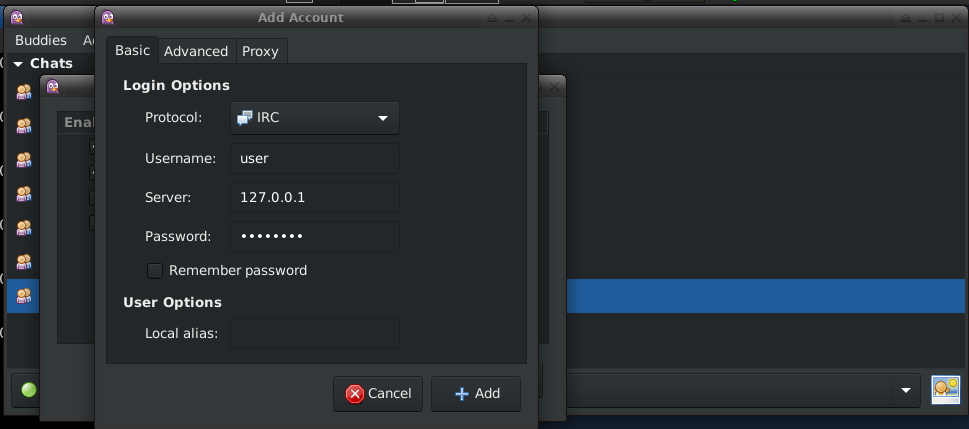
Click the "Add" button. In the window that opens, select "IRC" under "Protocol," and set the "Host" to 127.0.0.1. Then pick a username and password. IRC does not require you to register a nickname to join, but you may if you wish, after you connect to Irc2P.
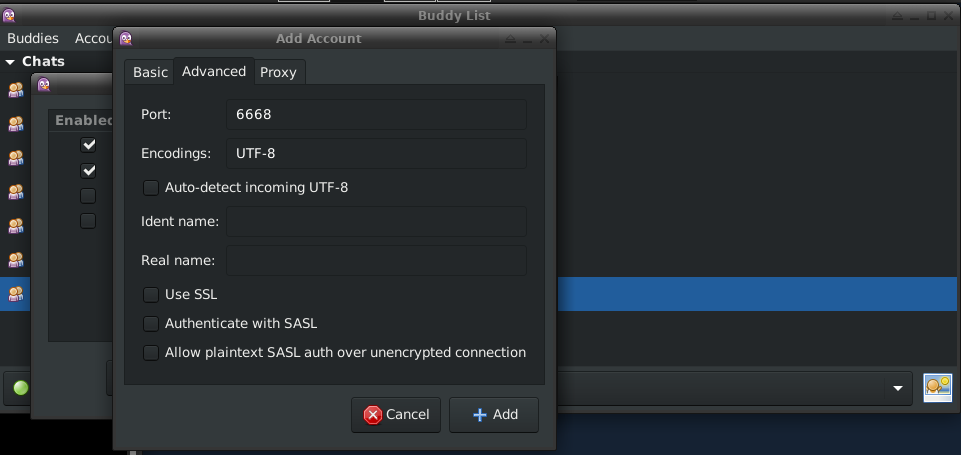
Navigate to the "Advanced" tab and set the "Port" field to 6668 and make sure that SSL is disabled, since your tunnel has encryption provided by I2P.
XChat
Open the Server List menu of XChat and click the "Add" button.
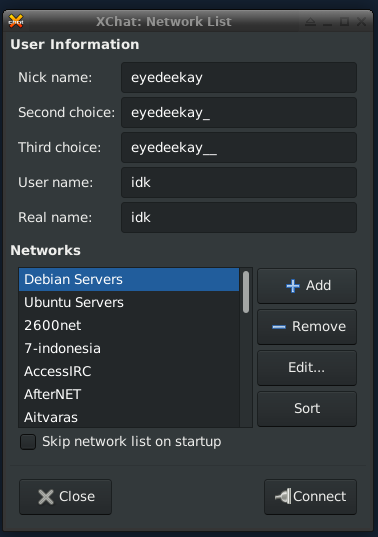
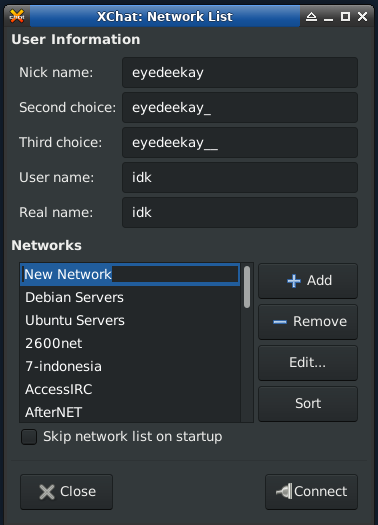
Create a new network named "Irc2P" to configure for I2P IRC. Click the "Edit" button on the right-hand side. Make sure you disable TLS and SSL inside I2P.
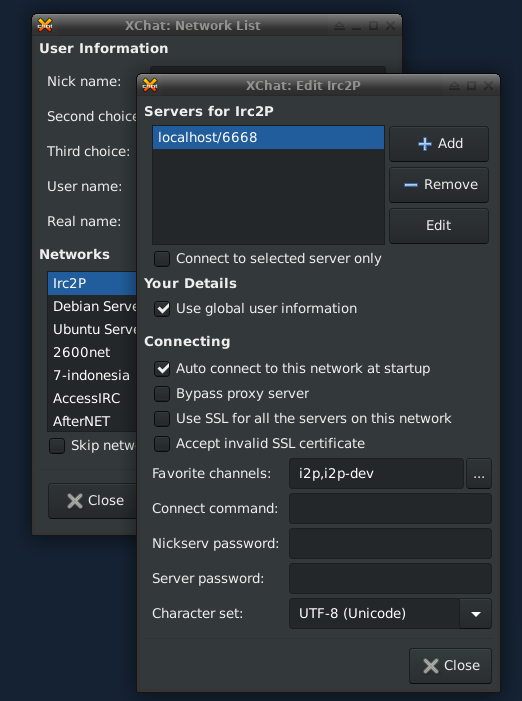
Change the value in "Servers" from the default to `localhost/6668`, and configure the default channels you want to join. I suggest #i2p and #i2p-dev
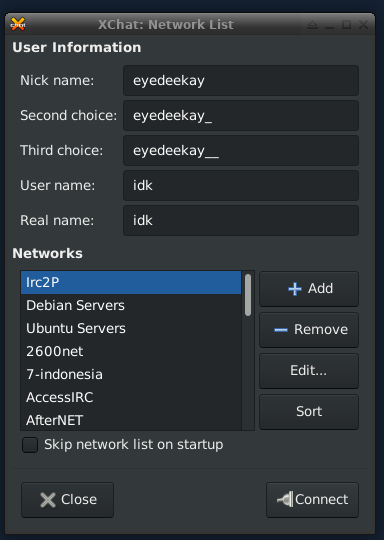
Close the "Edit Server" window from to return to the Server List page and click "Connect" to join I2PRC.
Thunderbird
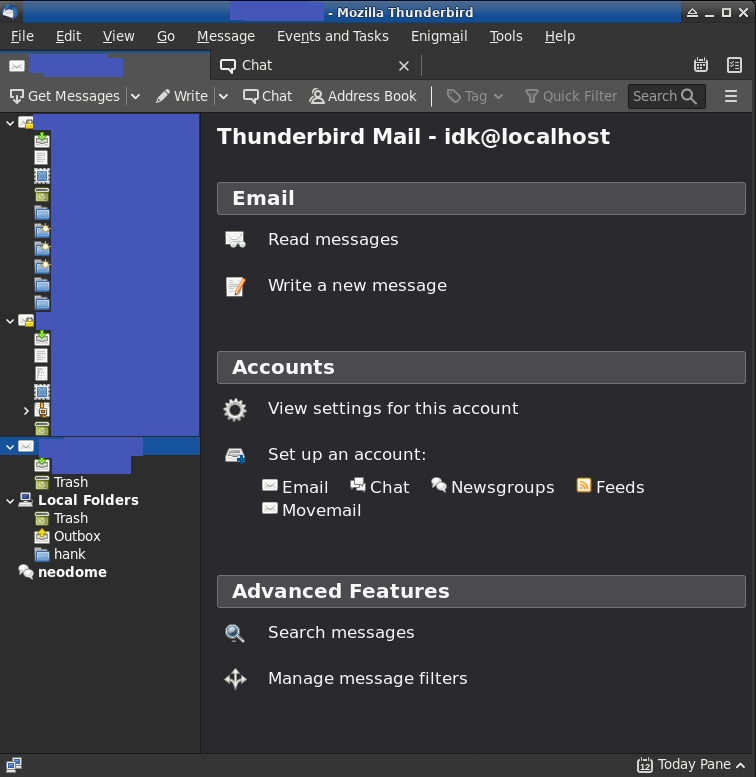
Click on the "Chat" button in the toolbar at the top of the Thunderbird window.
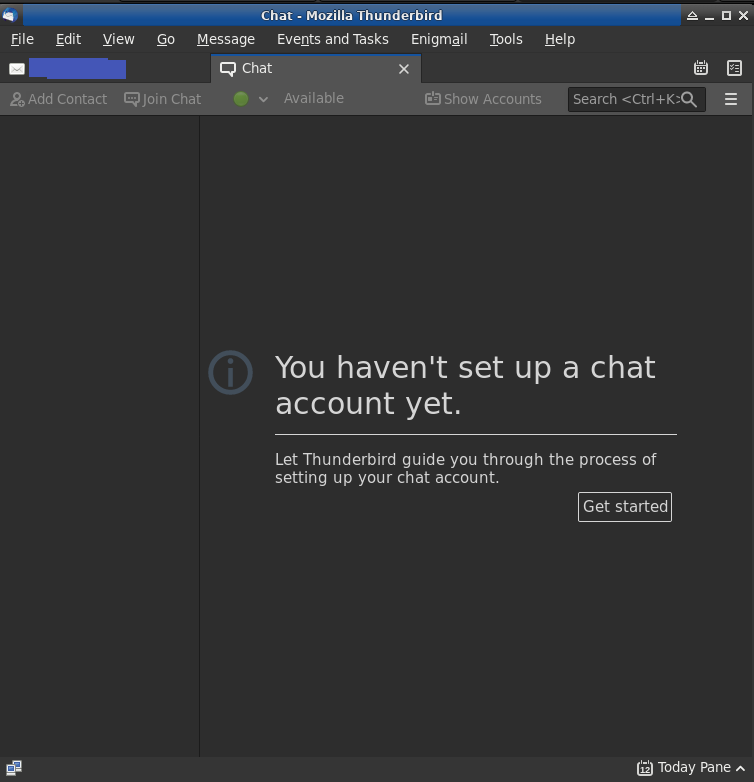
Click the get started button to begin setting up Irc2P.
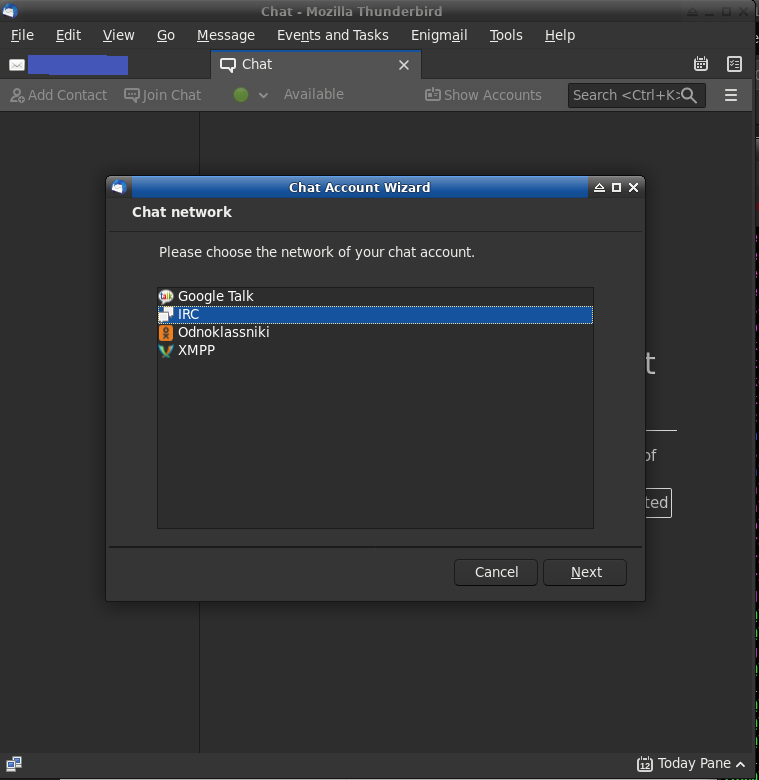
In the first step, select "IRC" for your network type.
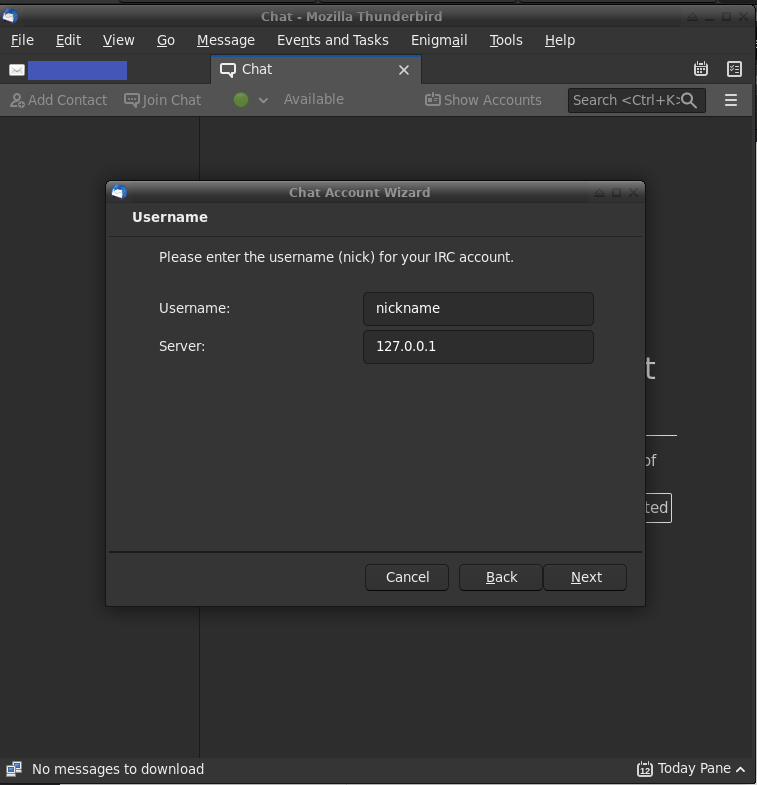
Choose a nickname and set your IRC Server to 127.0.0.1, but do not set a port.
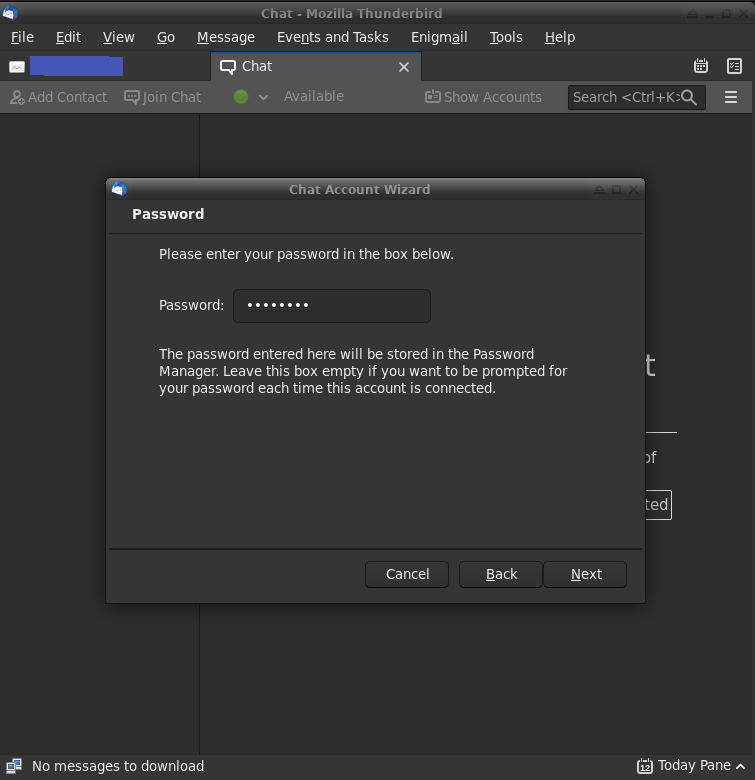
Set a password if you want.
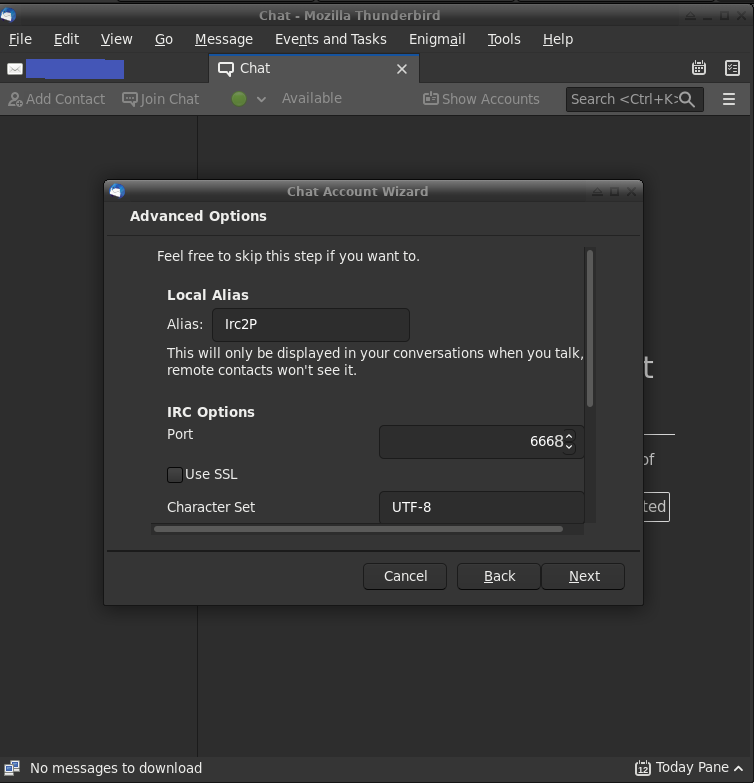
Configure the IRC Server with an alias like "Irc2P" and set the port to 6668.
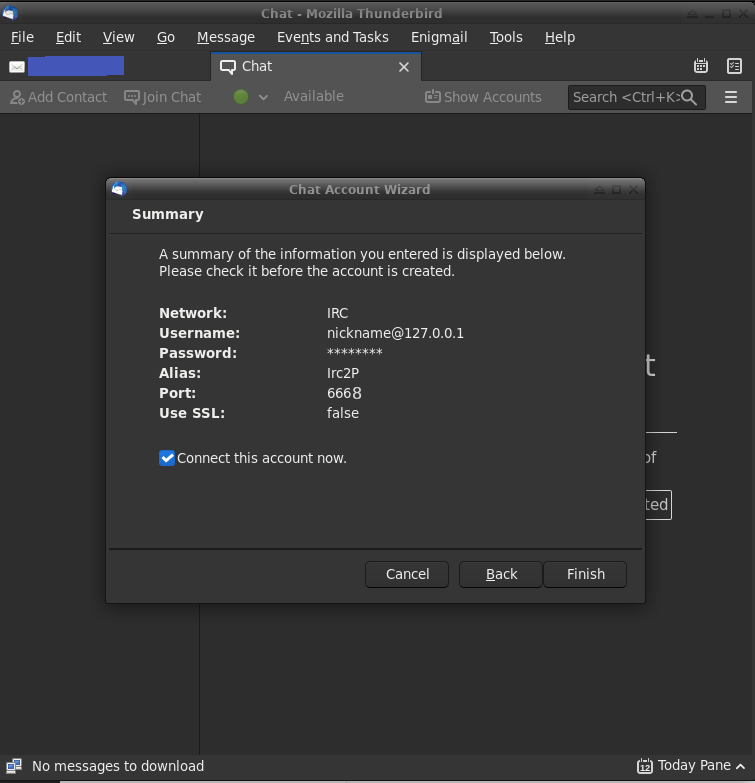
If your summary looks like this, then you're ready to connect with Irc2P.
Revolution IRC
Revolution IRC is an easy to use IRC client for Android. It's able to handle multiple accounts on multiple services, so you can use it for Irc2P and for your non-I2P IRC networks as well.
Click the "Add Server" button(Shaped like this: `+`) in the corner to get started configuring Revolution IRC for I2P.
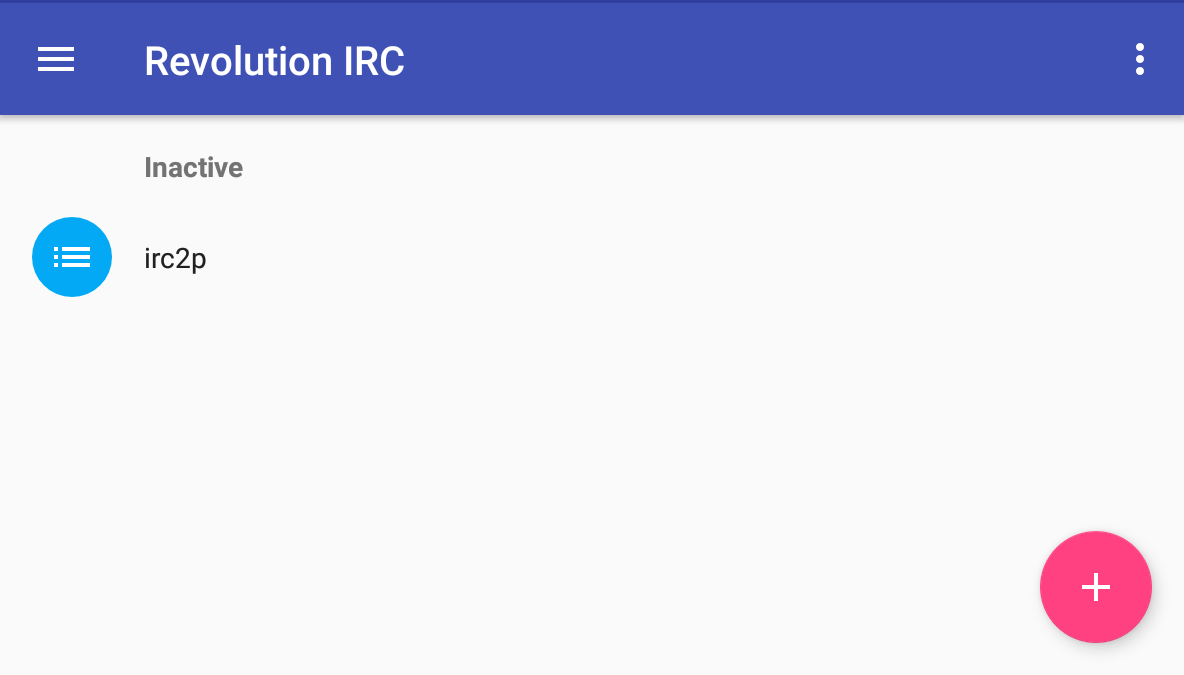
Fill in the server name, change the address to "127.0.0.1" and the port to 6668.
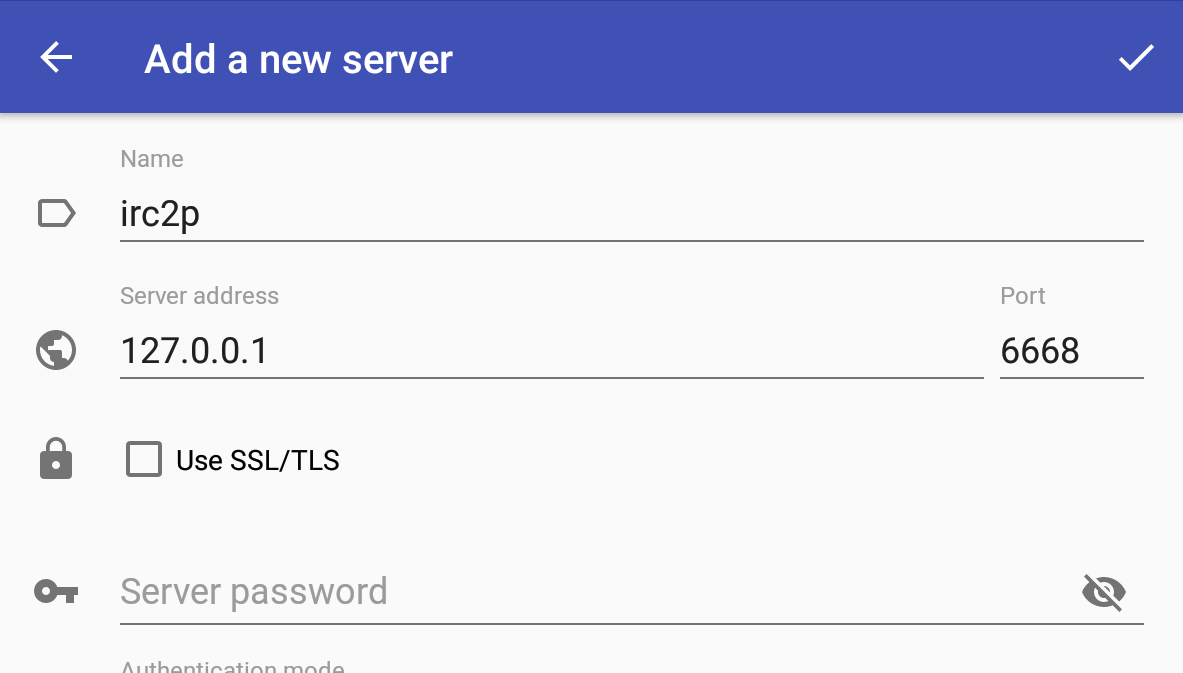
Give yourself a nickname and configure some channels to automatically join.
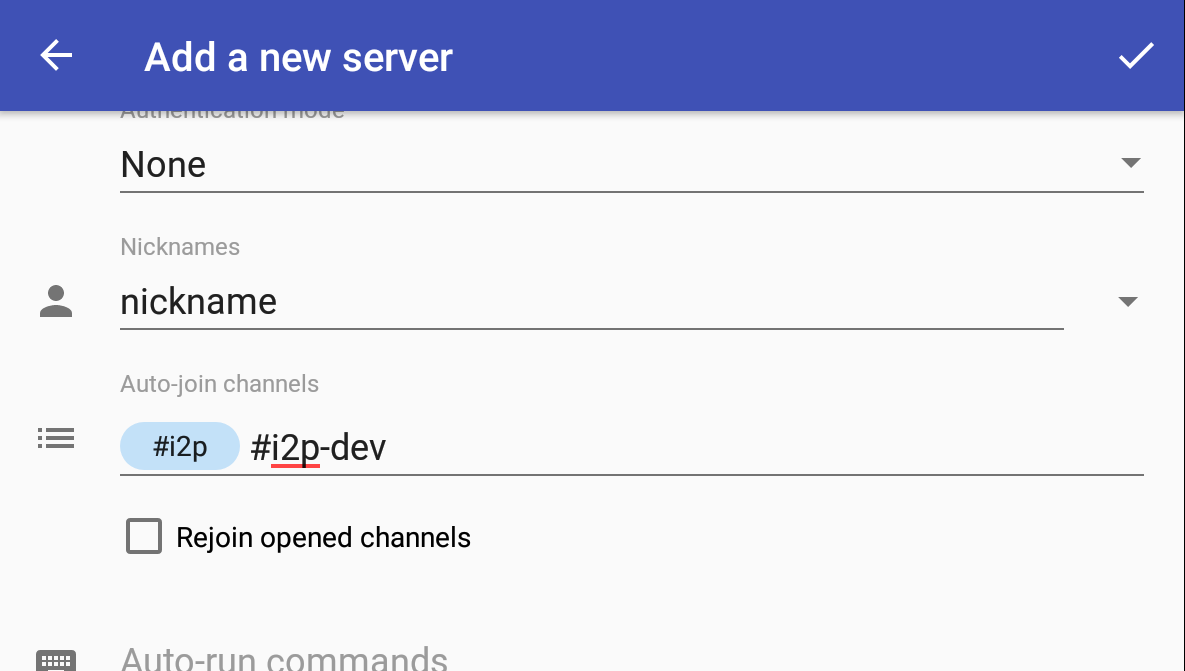
Dispatch
Dispatch is a stable, self-hosted IRC client with a web interface. It has native I2P configuration available by communicating over the SAM v3 API.
Dispatch is configured with a file called `config.toml`, which you can configure the common settings.
# Defaults for the client connect form
[defaults]
name = "myinvisibleirc.i2p"
host = "anircservergoeshere.b32.i2p"
port = 6667
channels = [
  "#i2p",
  "#i2p-dev"
]
server_password = ""
ssl = false
Servidores
Eris
Eris is an easy-to-configure IRC server with self-configuring support for I2P. If you want to run a private IRC server it's one of the easiest ways.
This is a valid configuration of the Eris IRC server, but it uses a default password for the admin account(admin). You should change the operator.admin.password and account.admin.password before deploying to a real service.
mutex: {}
network:
  name: Local
server:
  password: ""
  listen: []
  tlslisten: {}
  i2plisten:
    invisibleirc:
      i2pkeys: iirc
      samaddr: 127.0.0.1:7656
  log: ""
  motd: ircd.motd
  name: myinvisibleirc.i2p
  description: Hidden IRC Services
operator:
  admin:
    password: JDJhJDA0JE1vZmwxZC9YTXBhZ3RWT2xBbkNwZnV3R2N6VFUwQUI0RUJRVXRBRHliZVVoa0VYMnlIaGsu
account:
  admin:
    password: JDJhJDA0JGtUU1JVc1JOUy9DbEh1WEdvYVlMdGVnclp6YnA3NDBOZGY1WUZhdTZtRzVmb1VKdXQ5ckZD
www:
  listen: []
  tlslisten: {}
  i2plisten:
    i2pinfoirc:
      i2pkeys: iircwww
      samaddr: "127.0.0.1:7656"
templatedir: lang


